Monday, June 22, 2015

Barge Town Update #2

Well it's been a slow week or better on getting around to my "Barge Town" project but some progress is being made.

Earlier I post some about the Flat Bottom River Boat. more has been done on it and the other that are to come, basically I started out with foam core board and cereal box card board.


I slowly added strips if plastic to add more detail and looks to it, on the bow some paper staples as brush guards.


I hit it with a base coat of primer and the look came out great!


This is going to work out great for the Barge Town project, and it will work out for other games as well Pulp games traveling up or down a river, Jurassic World type games pretty much any other games that will be around water!

Just for a teaser here's a few pictures of "Jo Jo's Crab Shack", Jo Jo's Crab Shack was already on a barge moored on the Mississippi before the rise in water levels and was a main place for the locals to go for good eats, Jo Jo's also serves up some mean ribs too! You can see in the first picture I have been working on some smaller building and shacks as well


More is yet to come plan on having a small refinery barge for refueling and a salvaging barge as well!

I hope this inspire those you are on a budget that you too can make great  moleds with very little spending you just need to take a little more time.

Will be posting on how I built such building so keep watching!


Friday, June 5, 2015

Shipping Container (Update)

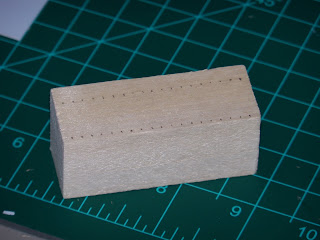
Okay posted sometime ago about Shipping containers made from a 36 inch 1x1 inch square wood dowels.


First I'll clean them up filing and sanding the edges removing any of the loose wood fibers.


Laying out at 1/8th inch  line pattern.


Then score the lines with a hobby knife, this cuts the wood fibers for the next step.


I then score the cut lines with a pointed object to press the wood inwards to create a panel effect into the wood.


Now I add strips of plastic stock for the frame work. The strips are 1/8th of an inch wide.


Now I layout little squares that will be the pick up points to the containers, and with a fairly small hole punch, punch holes in the center of the squares the cut the squares out and glue in place.


Next I added the doors.


A good coat of diluted wood glue again to insure nothing falls off!

Once they are all done, I will give them a good base of primer paint and then paint the containers to the colors that I want, then weathering effects will follow.


I know that they are not super detailed but, you get the idea that they are shipping containers.

This is a very cheap way to make such shipping containers and a lot of them, the only draw back is it take time to make them, If they get lost or just plain leave the table you haven't lost a lot. just make more.


Wednesday, June 3, 2015

Paint Find!

Working today and some great was put out on the sales floor a very great deal.

24 bottles of Crafter's Acrylic paint for just $9.88!


So if you need paint and cheap run to your local Home Depot and grab yourself a pack or more while they last!