Sunday, November 15, 2015

Tanks in the Wire!

Okay it's not about tanks, but is about wire or the simulation of barbed wire or concertina wire.

So seeing some the the great barbed wire terrain that other have made I thought that I needed some myself for defenses or obstacles.

Here is my attempt to do such a thing.


First I cut a strip of fiberglass screen so that it looks like a strand of wire with barbs on it.


Next I cut a line of brass 28 gauge wire twice the length of the Fiberglass screen.


Now the hard part, fold the brass wire in half at the loop you then place the looped end into the chuck of a drill,


 Now holding one wire and the fiberglass screen strip together with your finger tips, and the second wire you want to keep separate in your other fingers,


Now gently squeeze the trigger on the drill and let the drill do the work of twisting the wires and screen strip all together.


Trim the ends and now you'll have a long strand of barbed wire to do as you wish! Or wrap it around a small rod for making concertina wire. You could string it between wood post as well. Place it on top of chain link fence. Cut in in smaller sections for battlefield debris.


Here I wrap it around a small wood dowel.


Now it's a matter of basing and painting.


Tuesday, November 3, 2015

Hesco/Gabion Barriers

Seeing Hesco Barriers/Gabions Barriers from other manufactures and the cost to have enough to really do anything with, I figured I can just make them just as well after seeing someone else do it in 28mm range.


Tools and items needed are scissors, hobby knife, glue, 1/2 inch square wood dowel, fiberglass insect screen, hobby miter box and saw

So with a 1/2 inch square wooded dowel costing cutting it in to 1/2 inch cubes which would equal to a 4 foot by 4 foot cube more or less. A 48 inch dowel would make about 96 Barriers! But I know it will be less due to cut lost. It will still make for a lot of barriers.


Then some old fiberglass insect screen cutting it into 1/2 inch strips. I got my from a glass and screening place that does replacement for damaged windows and screens, I got a big piece for FREE!


Now with some wood glue I start gluing the screen strips to the wood cubes wrapping it around all four corners until the screen reaches each other then I just cut it away.


Once the glue has dried around the screen, I spread some glue on what I believe to be the top, I then had some sand to this fresh glue,


Once this is dried, you can mount them to a base to allow you to make a wall fast, You can make corners sections and straight sections, you can skip the sand part and just glue two of them together one on top of the other.


Now this might seem like a lot of work to get to this point but you can save a lot doing so, but you can have a fortified place that will look almost impenetrable.


I only made a couple for now just to see how the would look and to share what I have learned. I think they are going to be great and work really well for my gaming needs!

My plan is to use them in my Zombie games and post apocalyptic games mostly for the military units.

This project cost me less then 4 Dollars! And I'll have more then enough barriers then I can think of.

I hope the will inspire others as the post on The Miniatures Page did me! Now get out here and get your defenses UP and Running!

Thursday, October 29, 2015

Basing Part #2

Mounting the figures is just a basic mounting in an earlier post, Super Glue and washers, as to why I like the looks, now to add more to the base to build it up as to cover the molded figure's base and to give it a more level looking platform.

Where to go from here?


I'm using Milliput this is some really great stuff, it's a two part epoxy putty that air drys and no heating it to harden needed.

Tools needed Hobby knife and spatula tool.


So mix up two equal parts together until it has a uniform color and now your ready to work.


I take a little of it and roll it in to a little rope/worm.


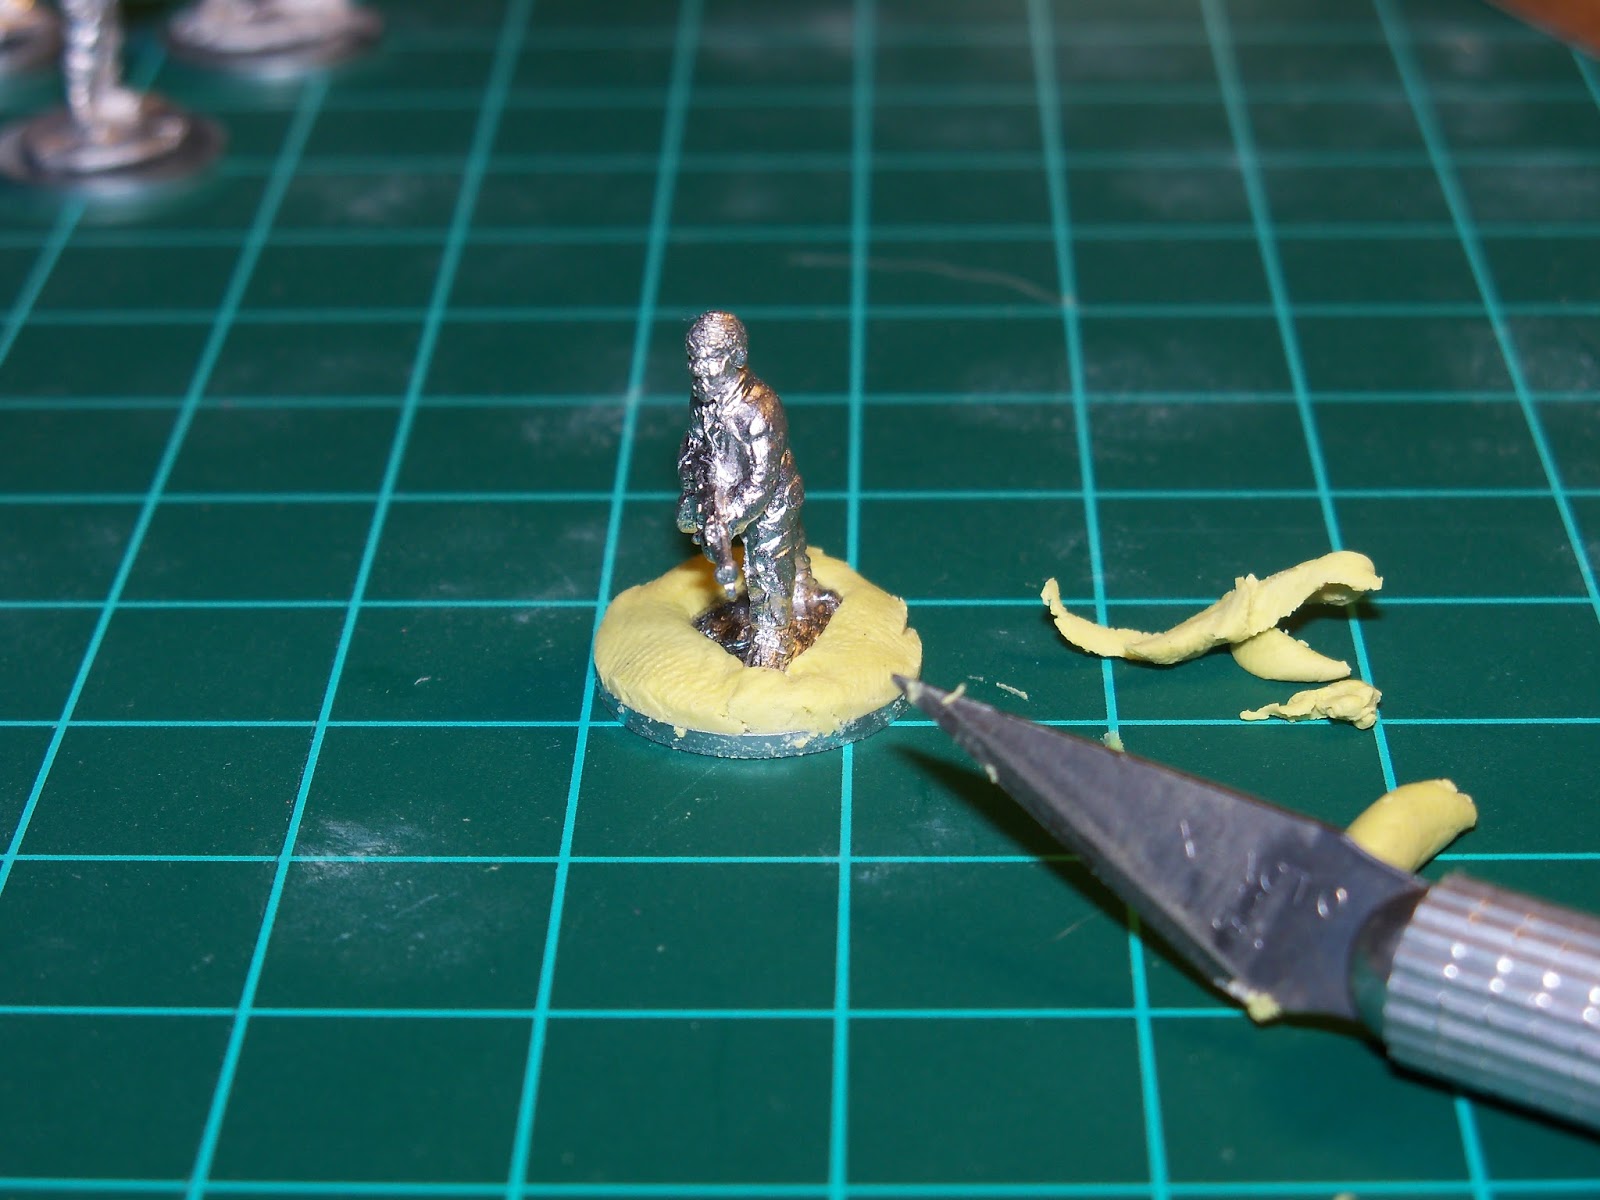
Then wrap it around the base and cut away the extra.


I then press it all in and around the base with my fingers, don't worry about finger prints we will make them go away.


Next using a flat edge tool I cut the extra away from the base.


Then with very little water I use my spatula tool to smooth everything out.

As you smooth the base out you may have to cut some extra putty so just use you hobby knife and have it handy as you go.


Now I'm a little out of practice but with time and practice they will become much smoother.

Now set it aside and let the putty harden.

Once dried you can sand the base a little smoother 


Now they are ready for a base coat of paint and painting.

I like the looks of a just plain old base without anything like ground cover or clumps of grass, Being that I don't like the looks of clumps of grass on the base when gaming in an urban areas or any build up area in general for most part and what little gaming I do in the open fields or woods is somewhat limited and still has a nice look to them.

This is not saying that if you like the look of ground cover and clumps of grass on your bases then I say go for it, the idea here is to help those who wish to make better looking bases for just that.

When finished the bases will be painted with a medium gray color, which works very well for me and I really like the looks and it allows your finished painted figure to stand out a little more.

The extra putty not used at this time is not going to go to waste, plan ahead you can make sandbags and other things with the extra putty.


I know this may seem very basic or that is something that every body already knows but, not everyone dose know and there is not many tutorials out there showing the next generation of gamers as to how.